How to Securely Connect to Azure VMs and Use RDP

What Are Azure VMs
Azure Virtual Machines (VMs) run on Microsoft’s cloud computing platform, Azure. They allow users to create, manage, and scale their own virtualized infrastructure in the cloud, without having to invest in physical hardware or deal with maintenance issues.
To establish a secure connection to your Azure VM, you need to make some preparations. You can avoid exposing your VM’s RDP port to the Internet, which reduces the risk of port scanning and brute force attacks.
None of the methods described below require you to assign a public IP address or open inbound ports in your Azure VM. They only need a virtual network with a private IP address assigned to the Azure VM.

Bastion
Azure Bastion uses TLS encryption and firewall traversal for RDP connections, which means your traffic is more secure and less vulnerable to attacks. You also don’t need to manage network security groups (NSGs) for your VM, as you can configure them to allow RDP only from Azure Bastion
There Are Many Ways to Use Bastion to Connect to Your Azure VM
-
Use your browser in Azure portal to access your VM using web technologies. Bastion from the web browser is as secure as using it with native client.
-
With Shareable link, you just go to Bastion in Azure portal, select the Bastion instance, navigate to Shareable links and create a new link.
-
Bastion and the Windows native client, the reason we use native client, in this article, is because it allows us to copy and paste files between our local computer and the Azure VM.
-
And more...
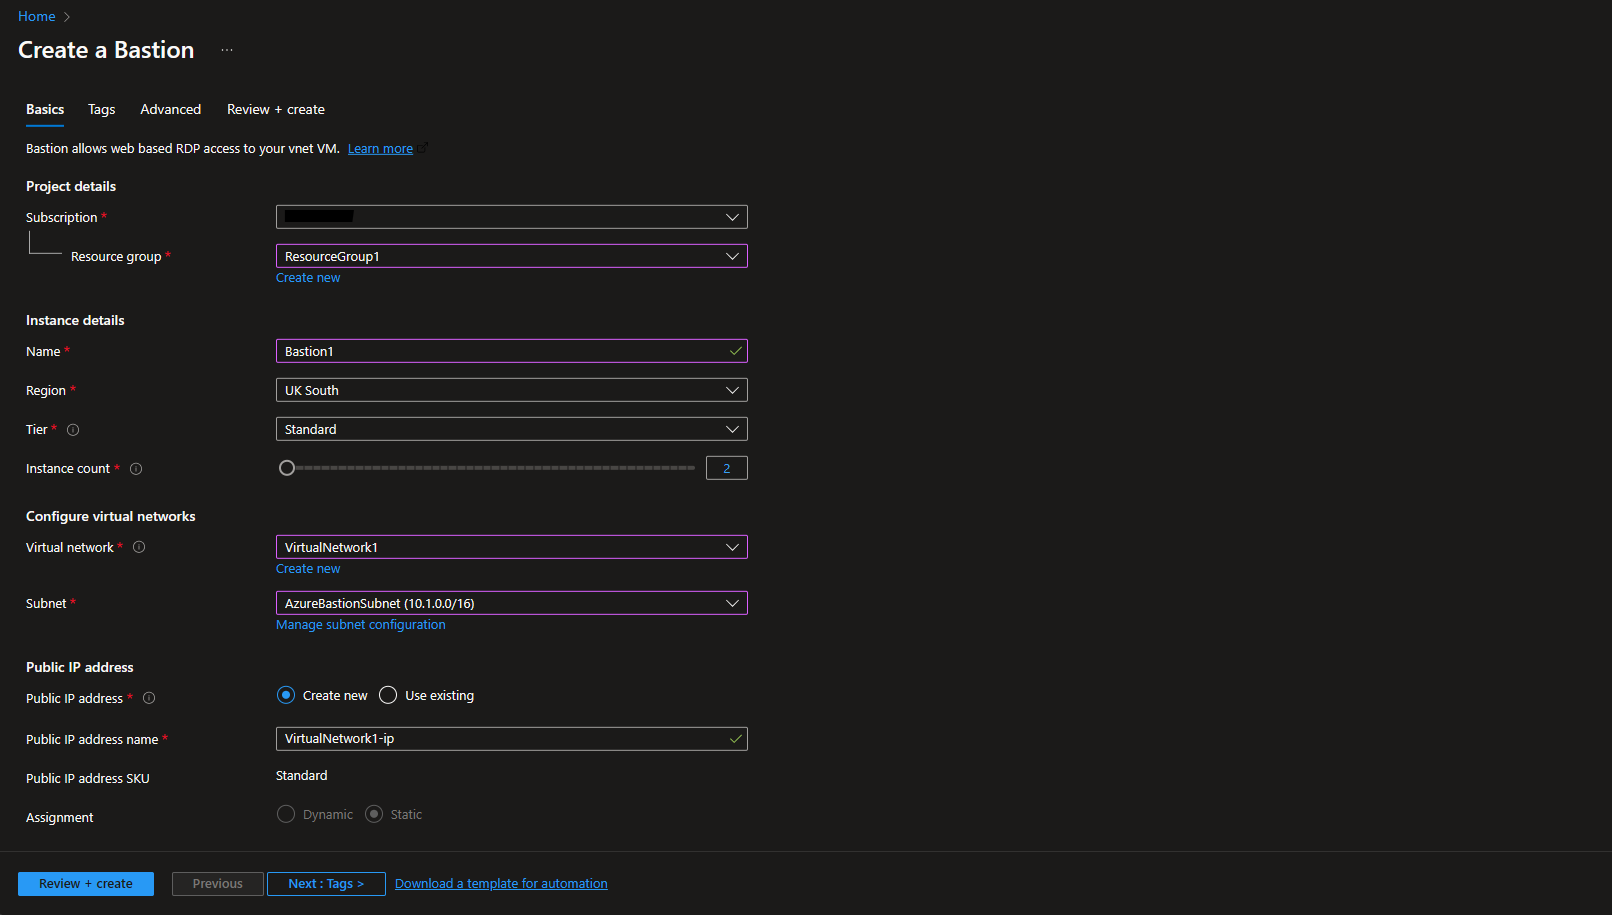
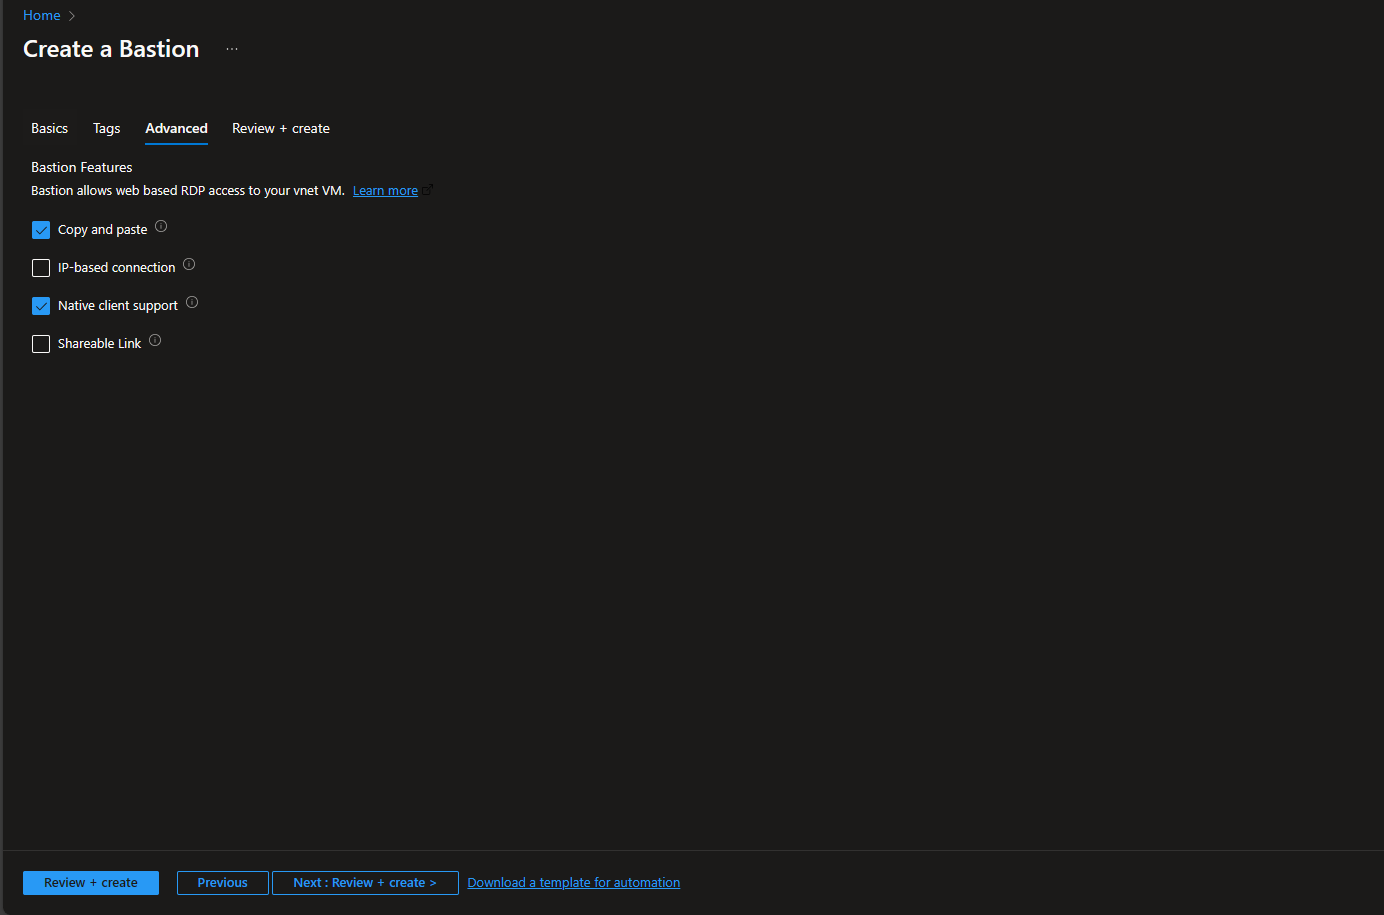
Let's Get Started With Using Bastion with Native Client
- First get the Bastion ready by Configuring it for native client connections
Screenshots 
- Install Azure CLI on your computer. There are many ways to do that but the easiest way is using Winget:
- Log in to your Azure account, a web page will open.
-
Gather the following details needed for the next command
- Bastion name, you can find it by going to your Azure VM and search for "Bastion"
- Azure Resource Group name
- The VM's Resource ID. The Resource ID can be easily located in the Azure portal. Go to the Overview page for your VM and select the JSON View link to open the Resource JSON. Copy the Resource ID at the top of the page.
-
Log into RDP, paste this in PowerShell
az network bastion rdp --name "<BastionName>" --resource-group "<ResourceGroupName>" --target-resource-id "<VMResourceId>"
You now have a secure connection to your Azure VM using Bastion Native Client.
Using Azure VPN - GUI Method
Azure VPN Gateway connects your on-premises networks to Azure, or connects Azure virtual networks together, through VPN setups such as Site-to-Site, Point-to-Site etc. The connectivity is secure and uses the industry-standard protocols such as SSTP, IKEv2, OpenVPN etc.
We need a resource group first because we're going to need a few components: Azure Virtual Network, Azure Public IP address, Azure VPN Gateway. We can either install everything in a separate group or install them in the same resource group as Azure VMs. It will work either way. For this guide, all of the resources reside in the same location, which is UK South.
Create a Resource Group
- Create a new Resource Group named
ResourceGroup1 - Set its location to
UK South(you can set it to somewhere else that is closer to your physical location).
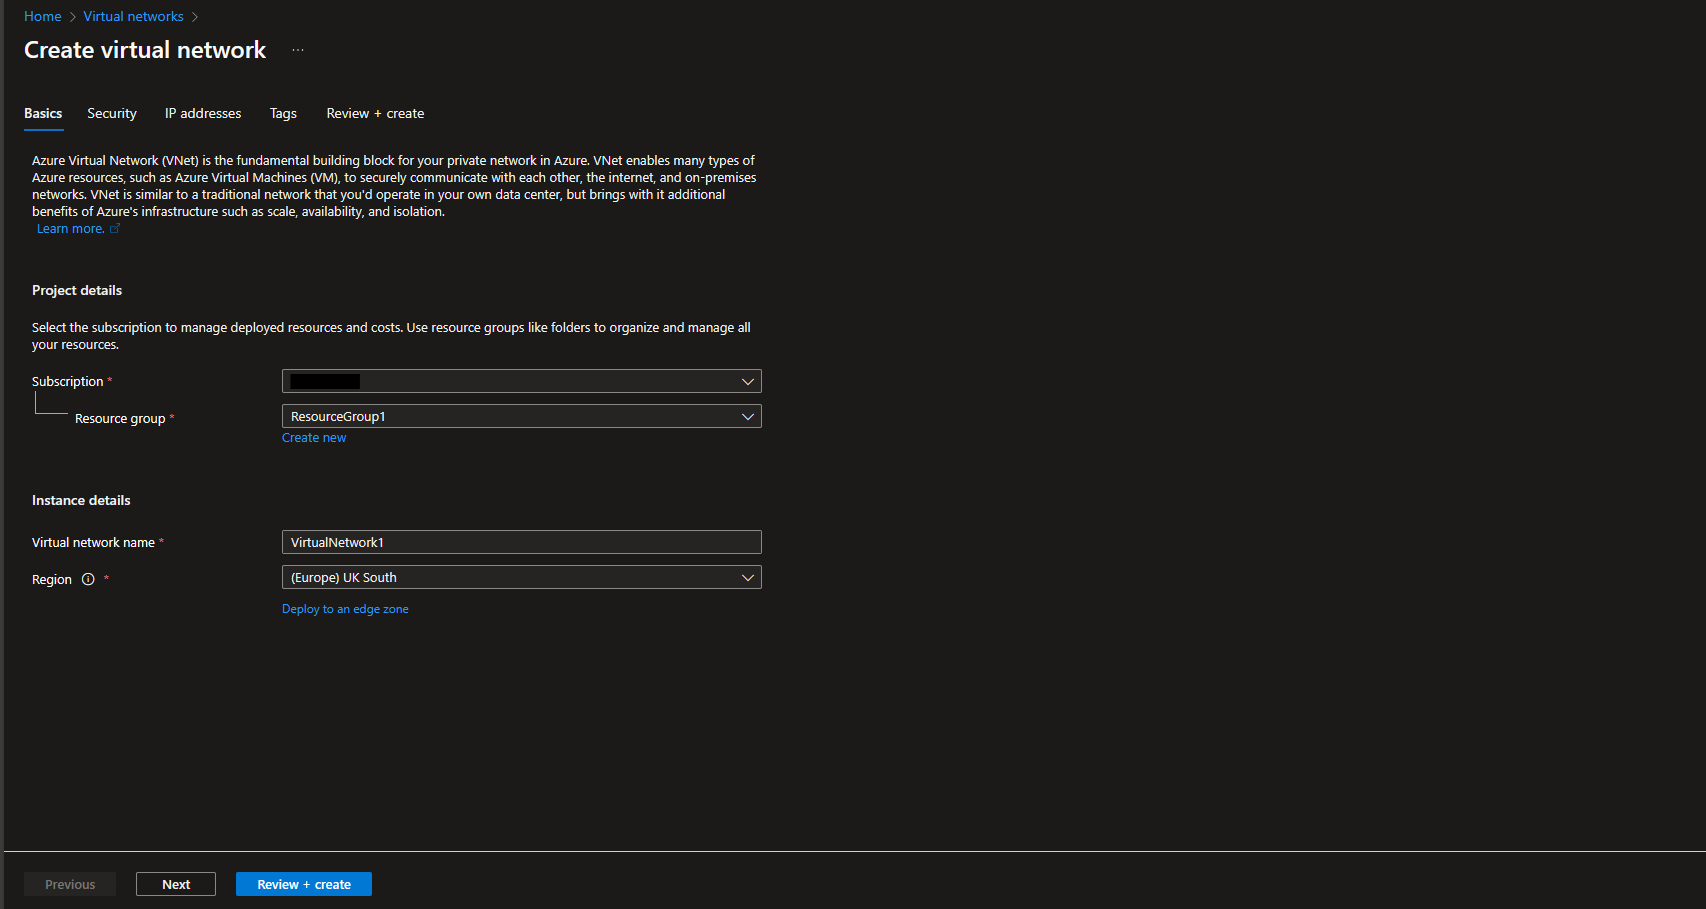
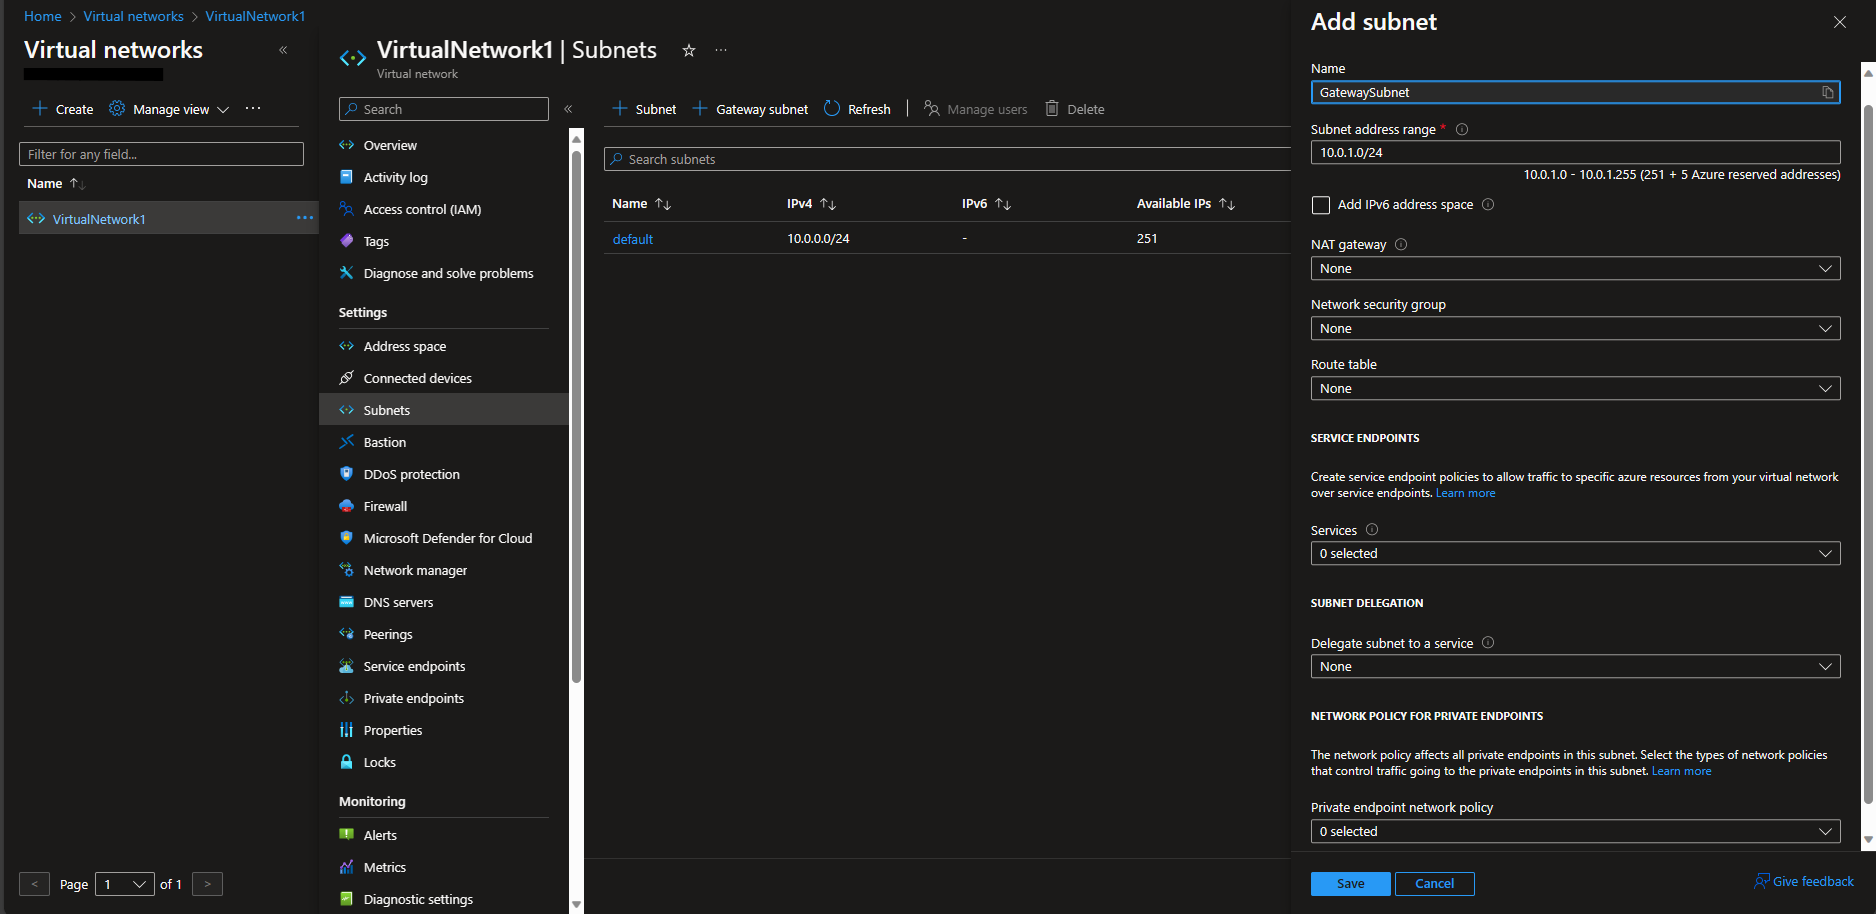
Create a Virtual Network With Subnets
-
From Azure Portal > Virtual Networks > Create Virtual Network
-
Name it
VirtualNetwork1 -
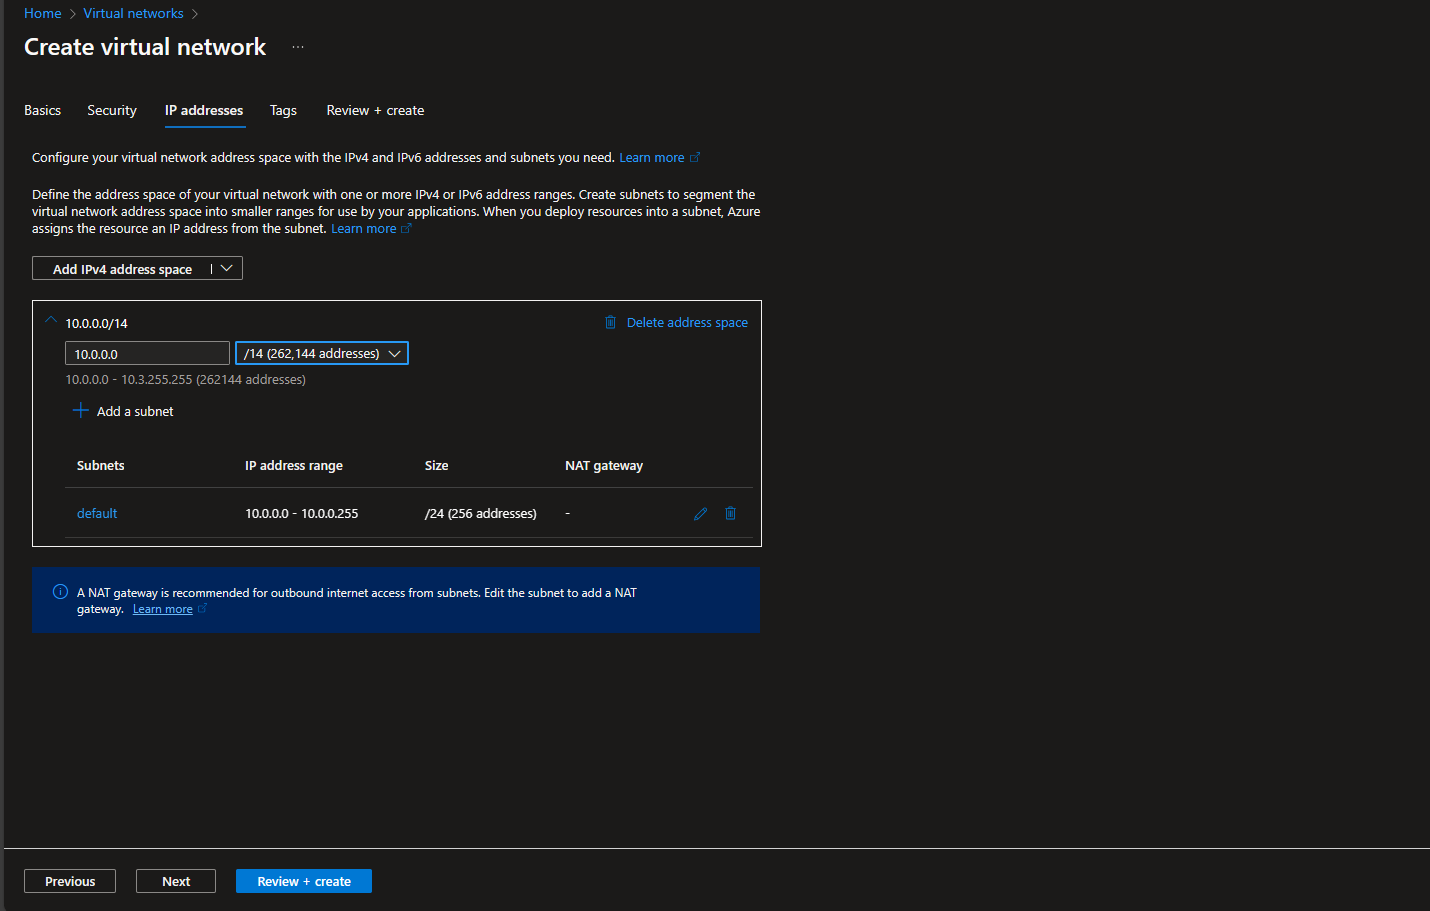
Set the IP address space of the Virtual Network to something like
10.0.0.0/14 -
Create a new subnet named
Defaultand set its address range to10.0.0.0/24 -
Create another subnet named
GatewaySubnet. Set its address range to10.0.1.0/24. This is for Azure Virtual Network Gateway.
Screenshots
Create a VM - Skip if You Already Have One
Create a VM in Azure and do not allow any open ports from Internet. Do not assign any public IP to the VM.
In the Virtual Network section, choose the VirtualNetwork1 for the VM and set its Default Subnet accordingly.
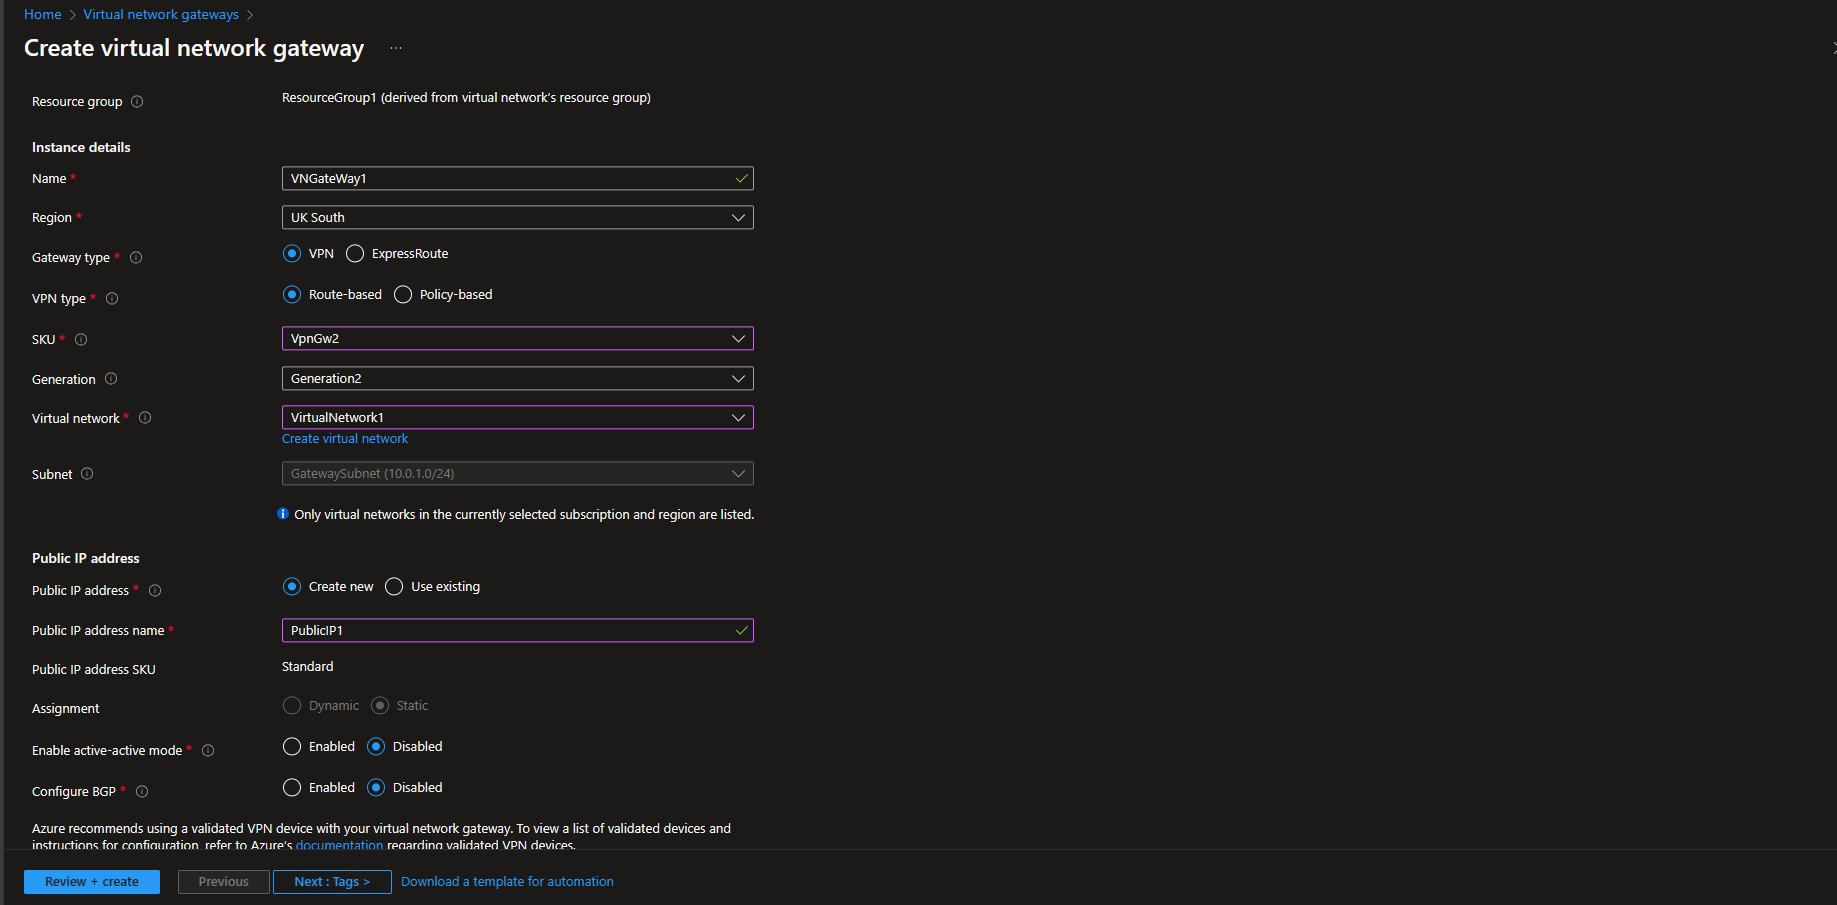
Create a Virtual Network Gateway
-
From Azure Portal > Virtual Network Gateways > Create Virtual Network Gateway
-
Name it
VNGateWay1 -
Select a Generation 2 SKU such as
VpnGw2 -
In the Virtual Network section, select the Virtual Network that we created earlier, called "VirtualNetwork1"
-
Create a new Public IP address called
PublicIP1 -
Configure Active-Active mode based on your preference. More info
- It provides redundancy and failover feature by establishing 2 simultaneous connections from your local machine to Azure network. The VPN Gateway will have 2 public IP addresses and your computer will connect to both of them at the same time.
-
Create the Virtual Network Gateway now
-
Wait for it to complete
Screenshot
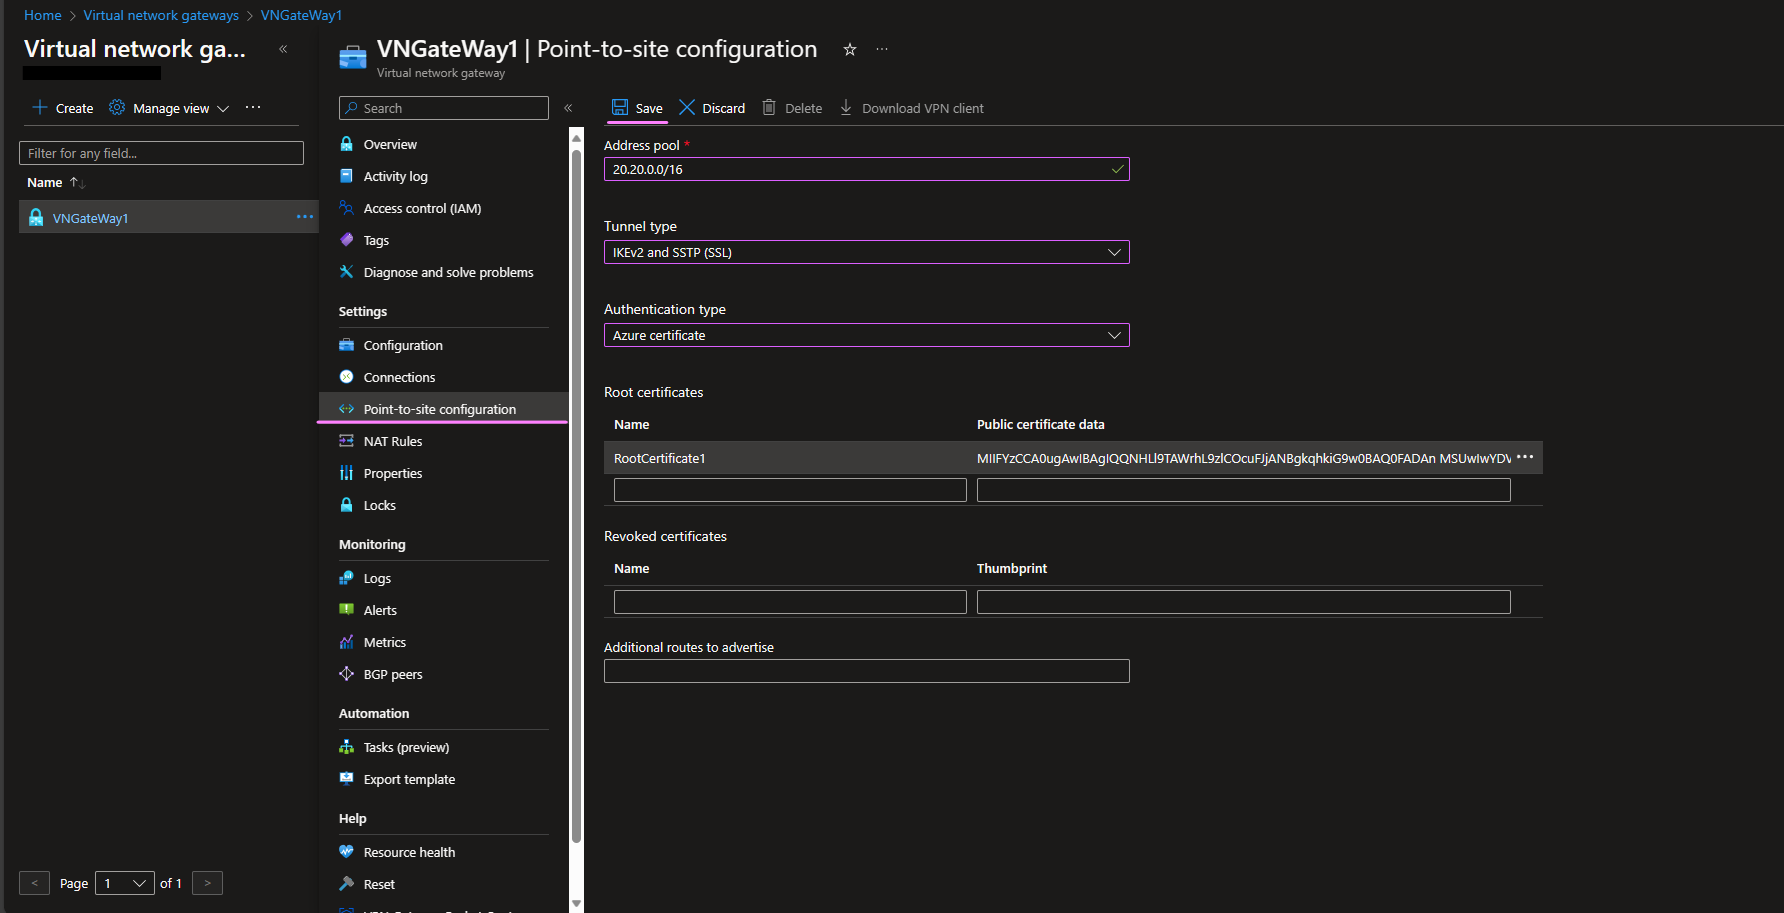
Create a Point-To-Site VPN Connection
-
Go to the VNGateWay1, Access "Point-to-site configuration" under settings section
-
Select Configure Now.
-
Enter
20.20.0.0/16in the Address pool. -
Set Tunnel type to
IKEv2 and SSTP. The VPN will use secure built-in protocols in Windows without the need for any 3rd party software. -
Set Authentication Type to Azure Certificate.
-
Create self-signed Root and Client certificates on your local computer if you don't already have the required certificates.
-
In the Root Certificates section, enter a name such as
RootCertificate1and in the "Public certificate data" field enter the root certificate's.cerfile content, by copying and pasting it from the file and excluding-----BEGIN CERTIFICATE-----and-----END CERTIFICATE-----.-
Export the Root certificate from the Users Personal certificates store, without private keys, as
Base-64 encoded X.509 (.CER), and open it with Notepad. -
Export the Client certificate from the Users Personal certificates store, with private keys, as
PKCS #12 (.PFX). You need to install it on the computer that you're going to use to connect to the VPNGateway and Azure VM.
-
-
Save the configurations and wait for it to complete.
-
Now access the VPNGateway again, navigate to the "Point-to-site configuration" section, Use the "Download VPN Client" button to download the required files.
-
Run the VPN client on the same computer you install the
.pfxcertificate on.
Screenshot
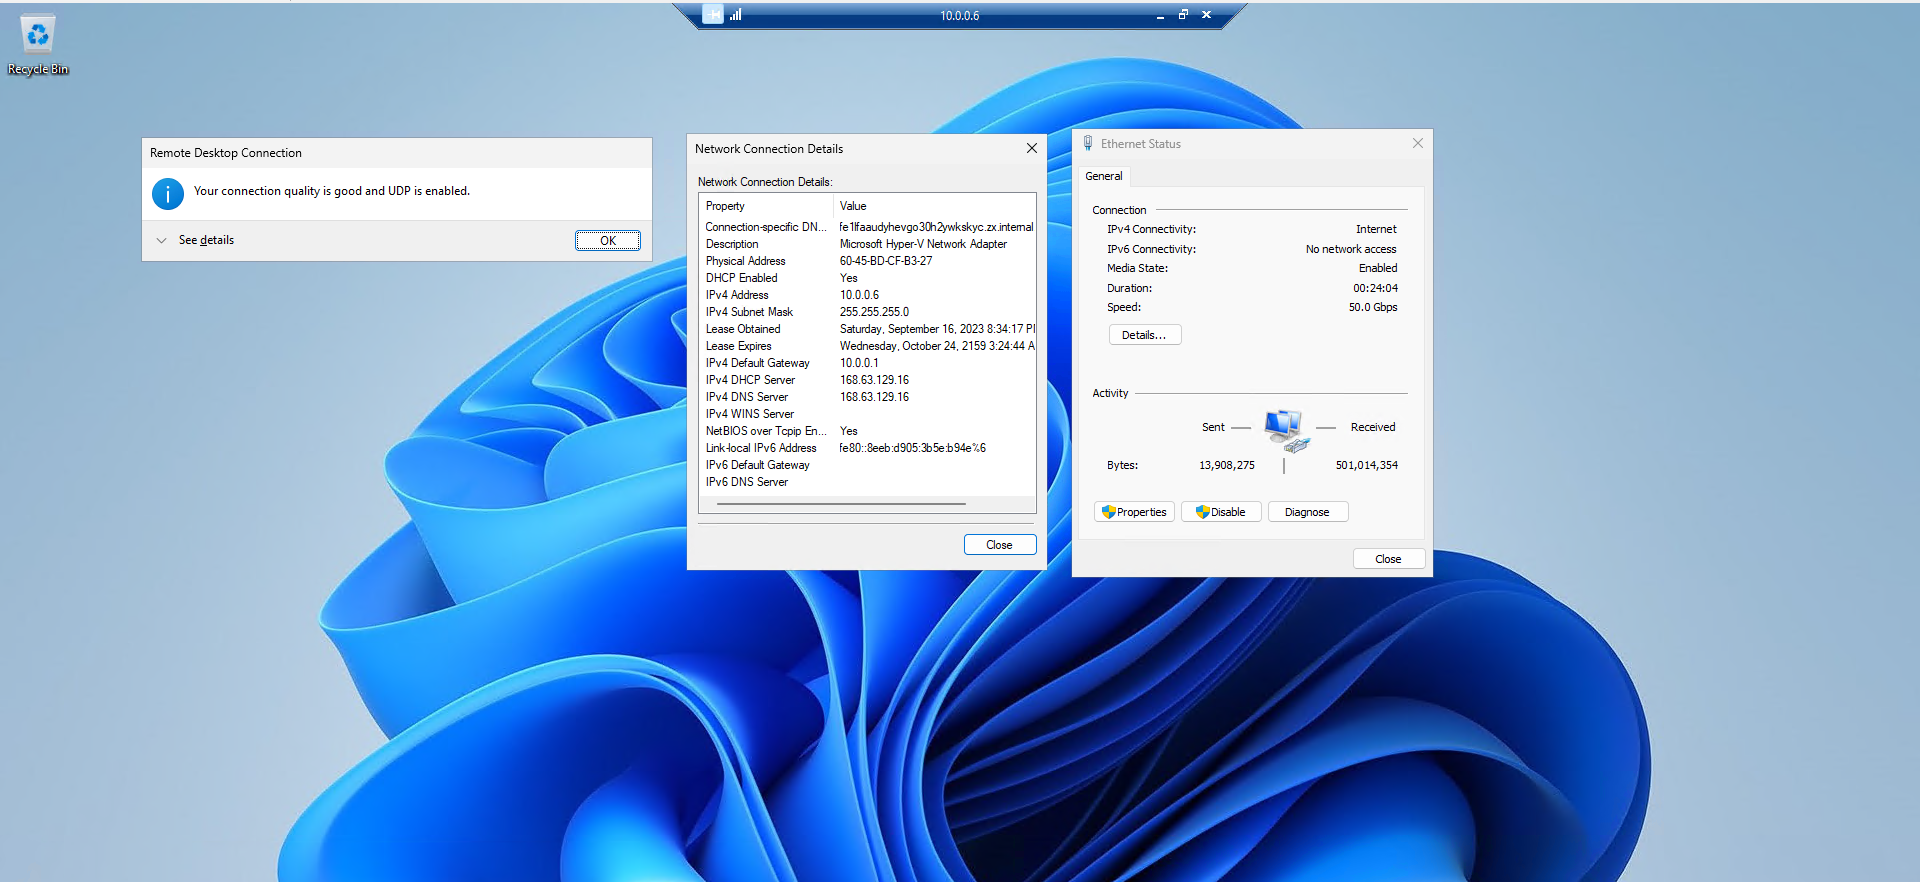
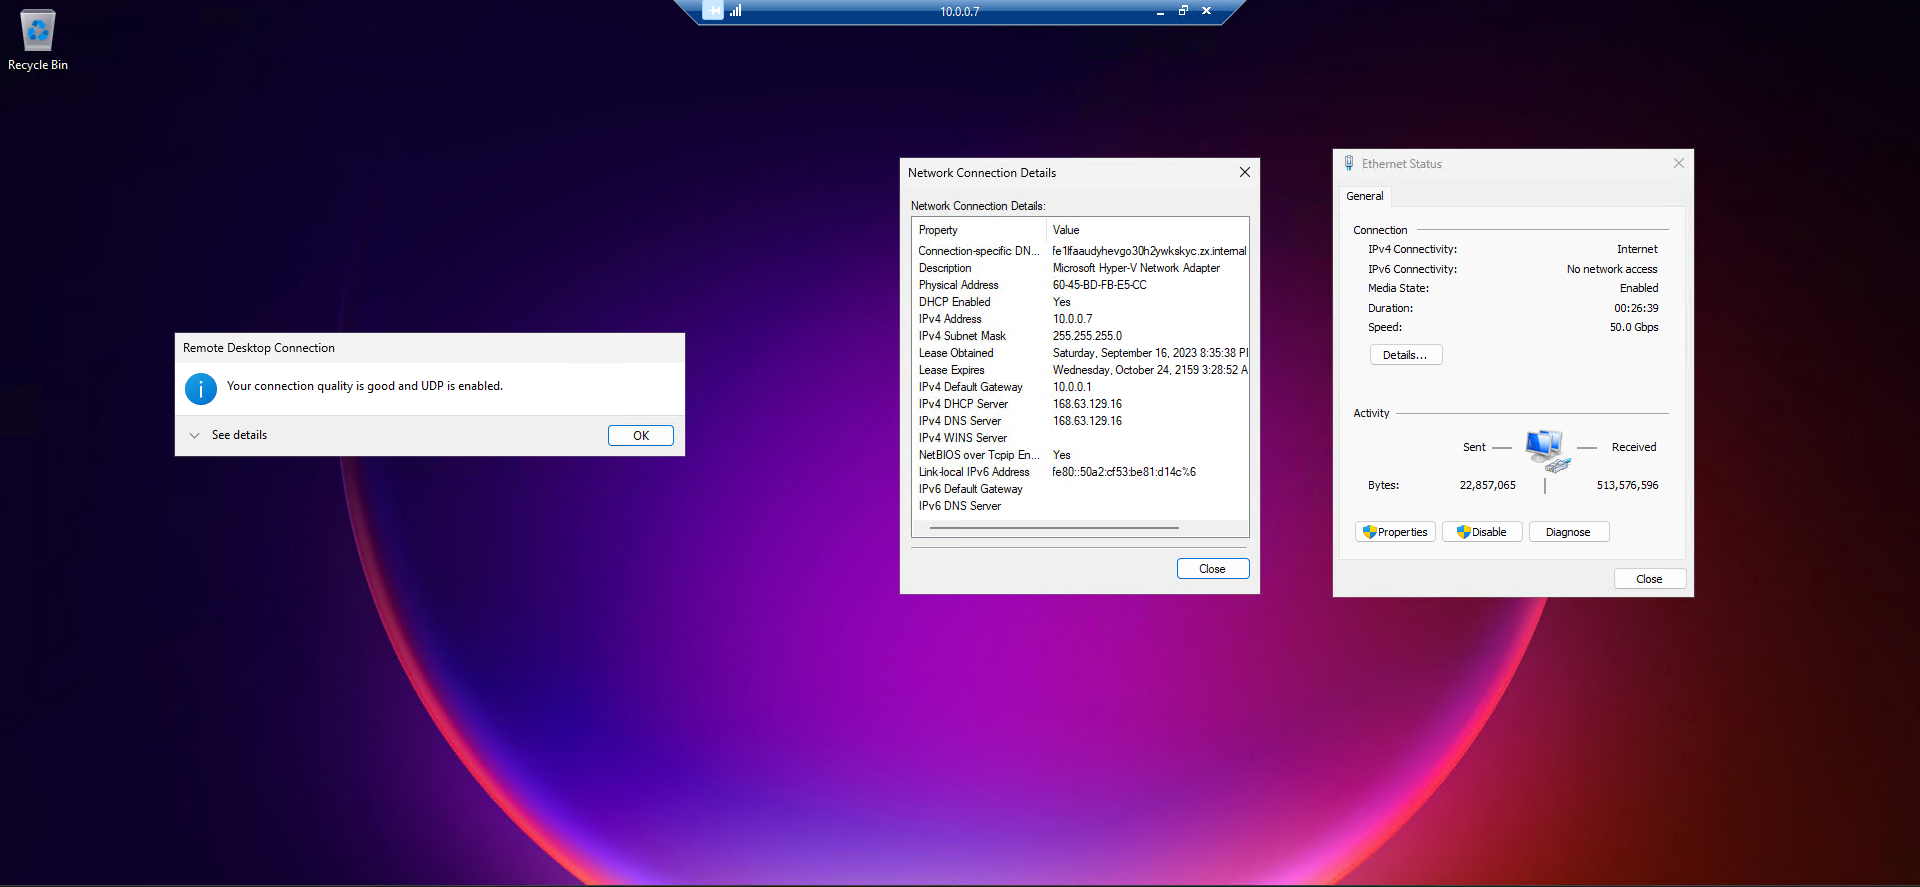
You can connect to other VMs (using RDP) on the same subnet using their private IPs from inside a VM.
When you don't assign a public IP to a VM, it will only have a private IP address; You can verify this from Control Panel inside the OS.
Screenshots
Using Azure VPN - Cloud PowerShell Method
Run on Azure Cloud PowerShell
# get all of the available location for Azure resources
Get-AzLocation | Format-Table -Property Location, DisplayName

# Create a new Resource Group
New-AzResourceGroup -Name 'ResourceGroup1' -Location uksouth

# Create a new Virtual Network
New-AzVirtualNetwork -ResourceGroupName 'ResourceGroup1' -Location 'uksouth' -Name 'VirtualNetwork1' -AddressPrefix '10.0.0.0/14'

# Get the virtual network we created
$VirtualNetwork1 = Get-AzVirtualNetwork -ResourceGroupName 'ResourceGroup1' -Name 'VirtualNetwork1'

# Add a new subnet to the virtual network named default
Add-AzVirtualNetworkSubnetConfig -Name 'Default' -AddressPrefix '10.0.0.0/24' -VirtualNetwork $VirtualNetwork1

# Add the GateWay subnet to the virtual network
Add-AzVirtualNetworkSubnetConfig -Name 'GatewaySubnet' -AddressPrefix '10.0.1.0/24' -VirtualNetwork $VirtualNetwork1

# Apply the configurations to the virtual network
$VirtualNetwork1 | Set-AzVirtualNetwork

# Create a public IP address
New-AzPublicIpAddress -Name 'PublicIP1' `
    -ResourceGroupName 'ResourceGroup1' `
    -Location 'uksouth' `
    -AllocationMethod 'Static'

# Get the Public IP address
$PublicIP1 = Get-AzPublicIpAddress -Name 'PublicIP1' -ResourceGroupName 'ResourceGroup1'

# Get the virtual network
$VirtualNetwork1 = Get-AzVirtualNetwork -ResourceGroupName 'ResourceGroup1' -Name 'VirtualNetwork1'

# Get the subnet that belongs to Virtual network Gateway from our Virtual Network
$VN1GatewaySubnet = Get-AzVirtualNetworkSubnetConfig -Name 'GatewaySubnet' -VirtualNetwork $VirtualNetwork1

# Specify the details of the IP Config for the Virtual Network Gateway
$IpConfigurations1 = New-AzVirtualNetworkGatewayIpConfig -Name 'IpConfigurations1' -Subnet $VN1GatewaySubnet -PublicIpAddress $PublicIP1

# Create the Virtual Network Gateway - This can take a few minutes to complete
New-AzVirtualNetworkGateway -Name 'VNGateWay1' `
    -ResourceGroupName 'ResourceGroup1' `
    -Location 'uksouth' `
    -IpConfigurations $IpConfigurations1  `
    -GatewayType 'Vpn' `
    -VpnType 'RouteBased' `
    -GatewaySku 'VpnGw2' `
    -VpnGatewayGeneration 'Generation2'
Run on Your Local Computer
# Create Root Certificate
$RootCert = New-SelfSignedCertificate -Type Custom -KeySpec Signature `
    -Subject 'CN=AzureVirtualGateway1RootCert' -KeyExportPolicy Exportable `
    -HashAlgorithm sha512 -KeyLength 4096 `
    -CertStoreLocation 'Cert:\CurrentUser\My' -KeyUsageProperty Sign -KeyUsage CertSign `
    -NotAfter (Get-Date).AddYears(10)

# Create Client Certificate
$ClientCert = New-SelfSignedCertificate -Type Custom -DnsName 'AzureVirtualGateway' -KeySpec Signature `
    -Subject 'CN=AzureVirtualGateway1ClientCert' -KeyExportPolicy Exportable `
    -HashAlgorithm sha512 -KeyLength 4096 `
    -CertStoreLocation 'Cert:\CurrentUser\My' `
    -Signer $RootCert -TextExtension @('2.5.29.37={text}1.3.6.1.5.5.7.3.2') `
    -NotAfter (Get-Date).AddYears(10)

# Get the RAW content of the Root certificate for upload to Azure - will be copied to your clipboard
[System.Convert]::ToBase64String($RootCert.RawData) | clip

# Export the Client certificate with private keys as PFX file
Export-PfxCertificate -Cert $ClientCert `
-FilePath ".\P2SClientCert.pfx" `
-Password $(ConvertTo-SecureString -String "123" -Force -AsPlainText) -CryptoAlgorithmOption AES256_SHA256 -Force
Run on Azure Cloud PowerShell
$p2srootcert = "<Root certificate's .cer file's content that is between -----BEGIN CERTIFICATE----- and -----END CERTIFICATE----->"

$RootCertificateAzure = New-AzVpnClientRootCertificate -PublicCertData $p2srootcert -Name 'VPNRootCertificate'

$Gateway = Get-AzVirtualNetworkGateway -ResourceGroupName 'ResourceGroup1' -Name 'VNGateWay1'

Set-AzVirtualNetworkGateway -VirtualNetworkGateway $Gateway `
    -VpnClientRootCertificate $RootCertificateAzure `
    -VpnClientAddressPool '20.20.0.0/16' `
    -VpnAuthenticationType 'Certificate' `
    -VpnClientProtocol 'SSTP', 'IkeV2'

# Download the VPN client using Azure CLI command
az network vnet-gateway vpn-client generate --resource-group ResourceGroup1 --name VNGateWay1